Wednesday, April 25, 2012

Patch Panel

In between the header fabrication I made a little patch panel for the front core support and some tension rod bracket re-inforcements.  I had a little fun with a dimple die while I was at it.  I made the panels out of 16ga steel so they would be strong since the front core ties the two frame/unibody rails together.  When welding in the panel I decided to try a product I hadn't before.  I got a weld through primer, I was a little reluctant to paint where I was about to weld, but that's how its advertised to work.  I sprayed the back side of the panel and anywhere I thought I might have trouble spraying after it was welded together.  My reluctance seemed to be correct, where ever the primer was my weld didn't want to penetrate until I had it all burnt away.


Uploaded from the Photobucket Android App
Really happy with how the dimple die worked
Uploaded from the Photobucket Android App
This part goes in the bottom of the tension rod bracket as a gusset.  I also made a cross bar like the Nismo power brace
Uploaded from the Photobucket Android App
I had to add a couple dimpled holes where they might be visible, when the car is together.
Uploaded from the Photobucket Android App
I tried out weld through primer, it was more of a burn it away with the mig, then weld process.  I wasn't impressed.
Also I received a call from Lingenfelter's this week, my valve springs finally came in.  I'm pumped, that means I get to take the drive to Decatur, IN and pick up my GT 2-3 cam, valve springs, and Cometic .040 head gaskets.  The remainder of parts for the final assembly of the engine.

Long Time No Posts

I haven't posted anything for quite some time now.  I had professional help lined up to help mock up the passenger side but he ended up being too busy, so that was a minor set back.  I guess the plus side to that is that I still can say that I made them to my design, with lots of helping hands, literally, its nearly impossible to hold all of those tubes into position alone.  I wanted to run all the tubes to one side or the other of the steering shaft, but the collectors wouldn't fit through and it wasn't working for the equal length thing either.  I ended up running the front two cylinders inboard, and the rear two outboard kind of like the passenger side.

Uploaded from the Photobucket Android App
This picture makes me wish I would have taken a picture of the headers outside of the car, the front two cylinders looked like snakes.

Photobucket
Both sides outside of the car.

Photobucket
See the steering gap, I'm hoping its enough, but if I have any problems I'm just going to stiffer motor mounts.

I still need to check the fit one last time on the car before the final weld on the flanges, everything should be good, but once its tig welded all the way around its a lot harder to go back.

Sunday, February 19, 2012

Equal Length Long Tube Headers Continued

So, building motor mounts to stuff a ls1 into a 240sx seemed like a challenge, but it was actually a breeze compared to building headers and attempting to make the tubes equal length.  My first length attempt was 32" with the collector just behind the firewall, to maximize ground clearance, it worked great for the two cylinders to the front of the engine, but not so well when it came to the back two, I had to pick one or the other to make the 32" length, then the one that didn't get the length was going to be 4-5 inches shorter which just wasn't going to work.  So I went back to the drawing board and came up with some creative tube arrangement to shorten all of the tubes to 28" the shorter end of the recommended length from cone engineering.


Photobucket
Notice the front most tube, its tucked as tight to the block as I could get it and actually enters the collector above the next tube behind it to make it possible to make these headers equal length.

I decided to tuck the front most tube in very close to the block and take the straightest path possible towards the collector, inserting it into the upper opening (rather than the lower opening where it would typically go), tucking the second tube from the front underneath it.  With this tangled tube arrangement, I was able to get the first three cylinders within 1/2" of length of each other and the last one within 2", this is not perfect equal length, but I think it will do.  I could have squeezed a little more length to get it closer to the 28" goal, but I would have had to have much more aggressive angles, which didn't seem worth it in terms of loss of flow. 


Photobucket
Front View


Photobucket
Here's the underside view, there's another new tool under there, an adjustable V-channeled (angle iron) tube tube stand.  Between this and the collector holder these are some massively helpful tools.  I've built these with a lot of inspiration from Advanced Chassis's shop tools.

The passenger side is now ready for tig welding.  The driver side is coming up, so its decision time, I wanted to make it in such a way that it could be installed without removing the steering shaft, but with the difficulty of the passenger side I'm not sure if that will be a possibility.

Sunday, January 29, 2012

Equal Length Long Tube Headers in a S13

My current project on this build is attempting to make a set of long tube headers.  I started with a 1-3/4" OD long tube header kit from Summit Racing, a set of 3/8" LS1 flanges and two 180 degree J-bends from Jegs.  The long tube header kit has tubes that are bent for a small block, probably to go in something pretty large, like a monster truck, because when I placed one of the pipes in the 240 it hung under the car about 2".  For this project I'm not sure if the kit was the way to go, but for about $100, after cutting the tubes up, I have a lot of bends to work with.  Also I was unimpressed by the fit of the collectors so I purchased a set of Megs formed merge collectors and merge bullets, these are beautiful pieces. 

Uploaded from the Photobucket Android App
Megs Merge Bullets after welding.


I was happy that I had called them they pointed me in the right direction for my power goals and my usage of the car.  As a result I am using smaller than typical collectors and going with a 2-1/2", the same size as my Y-pipe.  But with the tighter collectors I am going to have to make sure to have a good equal length design for my header tubes.  So far this has been extremely challenging.  

Update: I've made a new tool tonight that should help ease the process a little.  I made and adjustable collector holder to hold the header collector in position.


Uploaded from the Photobucket Android App

Uploaded from the Photobucket Android App


Photobucket


Photobucket


To be continued....pictures coming

Going In


Uploaded from the Photobucket Android App
That engine is going in this car!

This year I gave myself an early Christmas present.  I took some time, dropped the engine in and fabricated a set of motor mounts and a transmission cross member.  I'm trying to take a different approach, with the LS1 sitting on my Nismo motor mounts.  I was able to find some of the important dimensions searching the forums to get a good base line and had some plates laser cut for my mounts.

 
Uploaded from the Photobucket Android App
The LS1 went in pretty smoothly, but it had to come right back out.

Uploaded from the Photobucket Android App
We needed to do some more pounding in the tunnel, in a band from 4-6 inches in front of the pinch weld you have to knock it in at least an inch, it doesn't sound like a lot, but it takes some serious pounding to get there.  That's my friend Kurt in the tunnel, we were taking turns with the hammer.

Photobucket
Finally after getting savage on the tunnel with a compthane sledge hammer there was enough room to mount the engine where I wanted it.

Photobucket
There is the passenger side motor mount, its just tacked for the time being and there will be gussets if I stay with the tube design.  I have the engine situated with the sump of the oil pan about 1/4" above the bottom of the cross member which should offer it some protection against bottoming out.  Its about 1/8" forward of the cross member, in attempt to get it as far back as possible.  The biggest limiting factors in getting the engine low and back in a 240 are the heater core outlets if you want to keep heat (in NE Indiana its a necessity at least for the defrost) and the massive T56 bellhousing.


Photobucket

Photobucket
Drivers side, this side is going to be a nightmare when building headers.

Photobucket

Photobucket

Photobucket
Just in case you were wondering why the front looked so open in the other pictures, I cut the front core support and it is now a bolt in piece.  This is nearly a necessity if you want to make your own mounts and makes the engine go in and out a lot faster and easier

Saturday, January 28, 2012

The Engine and Clutch


Uploaded from the Photobucket Android App
2002 LS1 with Fueled Performance Moroso Oil Pan
The engine set-up is:

2002 LS1
799 Heads
LS6 Intake Manifold
Thin Cometic Head Gaskets for 11:1 compression
ARP Head Bolts
LPE GT2-3 Cam
LPE Matched LS9 Springs


Photobucket

Photobucket

Uploaded from the Photobucket Android App

I haven't determined which clutch I want to use yet.  I have a quartermaster twin racing clutch I was considering using, but I have decided that it was a little more aggressive than I wanted to deal with.  I working on finding a good, low mass alternative without going quite so extreme.

Photobucket


Decisions and Finally Picking Up an Engine


Uploaded from the Photobucket Android App 

This summer I began the tear down.  What started as a quick clean up job became much more.


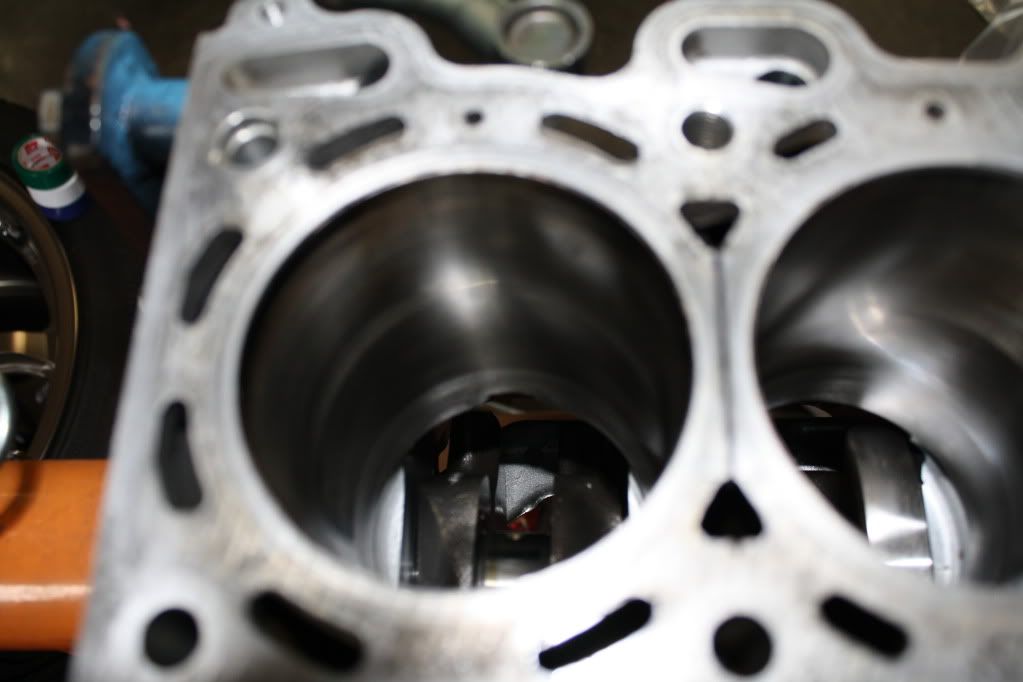
There was scoring in the cylinders, a broken section of  cylinder sleeve and one SR20DE rod that didn't belong, which I'm sure was doing great things for the balanced rotating assembly.  The LS1 decision caused a few sleepless nights, I loved making power with the disco potato boosted SR and the insane surge as it rushed up to 18psi.  The LS just seemed like a crime against nature, so much of what I had done to the car was to make it more like the Japanese Nissan Silvia and I was going to tear its 2.0 liter turbo charged soul out, sell it all for parts and replace it with American iron....er aluminum.  The decision finally just came down to logic, the car typically was spending more time apart than together, no fault of the engine itself, but I just couldn't build the same thing again, and every mod done to the car was to make more power and to keep it lower in the revs to make it more responsive.  The next natural progression was to use a v8 that wouldn't have to breathe hard for my modest power goals (375-390whp)

Locating an Engine

I started with buying an engine off of Ebay from some guy in Texas.  He seemed like a nice enough guy until about a month later when I was still getting excuses on where my engine was and couldn't seem to give me a straight answer on when it would ship.  I called him and he claimed that he didn't have the engine or the money and that some friend of his did.  Finally I had enough and luckily through paypal I was able to get my money back.  Round two:  I discovered Search Tempest and searched a 150 mile radius on Craigslist and found a few engines, I finally found one in Dayton.  Low mileage from a 2002 WS6, with a T56, it came with the improved LS6 intake, I was happy with my find.